ALSO I'm sorry for the awful quality of the picture above, my room has horrible lighting and i promise it looks SO much better in person!
First I bought a twin flat sheet at Walmart. I think it was about 5 bucks which was fantastic.
I folded that sheet in half and pinned it down in order to cut it. There are a bunch of ways to cut it in half, i just figured this method would give me the straightest edge.
Then, I sewed each of the edge to make a hem line so the tapestries wouldn't fray on the edges. If you haven't mastered the art of sewing, you can buy some stitch witchery at your local craft store and use that to close the edges.
The first is the technique that is a spin off of shibori dye jobs. Shibori typically uses indigo dye in order to make beautiful designs with that rich, dark color. I however bought a tie dye kit and used the purple color along with the left over teal from the second tapestry that I made.
- One twin sized flat sheet
- scissors
- sewing machine (or stitch witchery)
- rubber bands
- dye (however many colors you want to do)
- if you use the dye from the other project I did, see how to make it here
- plastic gloves
Once you have your sheet cut into two, you can start folding!
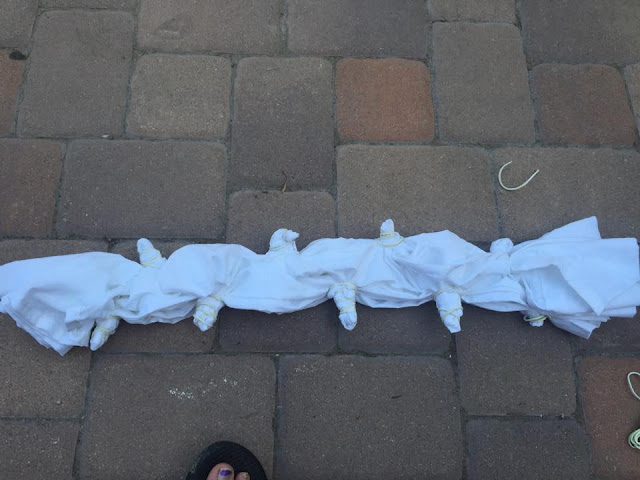
Start by folding the sheet like an accordion, starting from any side that you want. I went up and down rather than side to side.
Next, start bunching up the sides in equal distances and wrapping rubber bands around them.
After this, you can choose to fold the entire thing in half and rubber band it together, or dye it as is.
Once the rubber banding was finished, I laid the entire thing out on my lawn and put the dyes in the squirt bottles and began applying the dye. Don't forget to put gloves on.
I let this sit for 6 hours to soak in the dye and then cut off the rubber bands. Once you cut off the rubber bands, rinse in the sink until the water runs clear. When you are done rinsing, hang it to dry.
Again, this picture does not do the finished product justice.
enjoy!
xoxox Rachel


No comments:
Post a Comment