
Mirror Coat Rack
Hi everyone!
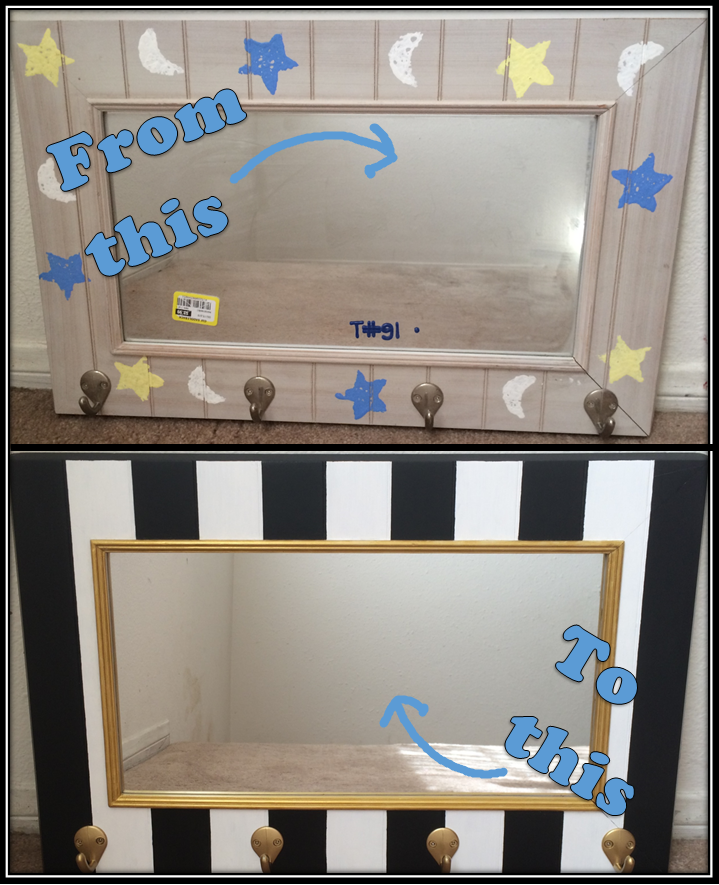
Recently I have been doing a lot of crafting for my new apartment, and I thought I would share this beauty with you! I went shopping at Goodwill to see if they had anything that could use a good makeover, and stumbled across this cool coat rack with a mirror. The decor for my apartment is black, white, and gold, so I used that color scheme for this project! This is a really specific tutorial, but the concept can be used to give endless items a good makeover!
Steps:
1. Remove hardware.

This must be done so you can sand/ paint smooth lines, instead of trying to paint around them.
2. Sand


I sanded down the entire frame mainly to remove the existing paint. That way there wouldn't be any awkward star shaped bumps when I went to paint. As I sanded, I used a brush to remove dust from the crevices. The third photo shows the frame once I was done sanding.
3. Paint- main colors


Now to the fun part! I started painting with white since it was the lighter color and would therefore be easy to correct with the black if I went over the lines. I was lucky with this frame because there were already lines in the wood! I ended up doing two coats using a foam brush (first pic shows difference between 1st and 2nd coats), and then smoothed that off using a soft bristle brush (second pic). When that was finished, I started the black by using a very fine bristle brush to make sure my lines were perfectly straight. I then used the foam brush to get the rest of it on there. I painted the outer sides black too.
4. Paint- accent color


Next, I used a small bristle brush to apply the gold paint. I ended up doing three coats of this color to make sure the boarder popped!
5. Paint hardware

 For the hooks, I used Rustoleum's Metallic Gold spray paint. This has with out a doubt become my favorite paint, and I have spray painted almost all of my other decorations with this color. I flipped a box upside down so that I could stick the screws in to paint them. I just did one coat and they turned out perfect! Once they were dry, I screwed them back onto the frame.
 And voila! A simple and cheap home decoration! I hope you all enjoyed this tutorial! Please feel free to comment any of your own Thrift Shop Makeovers!
Bisous,
Lauren


No comments:
Post a Comment