Showing posts with label dorm. Show all posts

Monday, August 31, 2015

DIY Wall Tapestry


Hey ya'll! so I spent a bunch of time trying to come up with ideas to make wall tapestries for my dorm room because I don't really want to pay 30+ bucks for one. I tried a few different techniques, including a glue/dye job which if you would like to know more about, leave a comment at the end of this post! Today I am going to talk to you about the first of two different techniques that I used.

ALSO I'm sorry for the awful quality of the picture above, my room has horrible lighting and i promise it looks SO much better in person!

First I bought a twin flat sheet at Walmart. I think it was about 5 bucks which was fantastic.
I folded that sheet in half and pinned it down in order to cut it. There are a bunch of ways to cut it in half, i just figured this method would give me the straightest edge.

Then, I sewed each of the edge to make a hem line so the tapestries wouldn't fray on the edges. If you haven't mastered the art of sewing, you can buy some stitch witchery at your local craft store and use that to close the edges. 


The first is the technique that is a spin off of shibori dye jobs. Shibori typically uses indigo dye in order to make beautiful designs with that rich, dark color. I however bought a tie dye kit and used the purple color along with the left over teal from the second tapestry that I made.


  • One twin sized flat sheet
  • scissors
  • sewing machine (or stitch witchery)
  • rubber bands
  • dye (however many colors you want to do) 
    • if you use the dye from the other project I did, see how to make it here
  • plastic gloves

Once you have your sheet cut into two, you can start folding!
Start by folding the sheet like an accordion, starting from any side that you want. I went up and down rather than side to side.


Next, start bunching up the sides in equal distances and wrapping rubber bands around them.
After this, you can choose to fold the entire thing in half and rubber band it together, or dye it as is.
Once the rubber banding was finished, I laid the entire thing out on my lawn and put the dyes in the squirt bottles and began applying the dye. Don't forget to put gloves on.

I let this sit for 6 hours to soak in the dye and then cut off the rubber bands. Once you cut off the rubber bands, rinse in the sink until the water runs clear. When you are done rinsing, hang it to dry.

Again, this picture does not do the finished product justice.

enjoy!
xoxox Rachel


Tuesday, August 26, 2014

DIY Duvet Cover For Your Dorm


Hey y'all. I've been dorm planning ever since I started to our colleges my junior year. I've gone through so many phases of color scheme, preppy, modern, artsy, boho, and so on and so forth, and I've done my share of duvet cover shopping. I've seen a lot of stuff that I liked, but not really much that I drop dead loved. Some  things that caught my eye were:
xx
Both waaaaay outside my price range. If I'm going to pay $100 + for my duvet, why would I want to spend another $100-$200 on its cover. Seems a bit too pricey for my liking. And that's when the light bulb went of in my head. Why not make it on my own, and get the best of both worlds (errr.. duvets)?! So I headed to Pinterest to find some DIY tutorials on duvet cover making. The winning tutorial was from The Sewing Rabbit, which gave me the basic gist of how to sew one, however I was going to make mine look completely different.

Step One: Collect Your Materials

What you will need:
  • Two flat white top sheets (x)
  • Screen Printing ink (x)
  • About 60 skeins of embroidery floss (x)
  • Ruler
  • Scissors
  • Big water color paint brush (x)
  • General Sewing Supplies

Step Two: Tassel Time

 
The first thing you want to do is cut a piece of floss into 8 equal sections. (About 5 lengths of the skein did it for me.)

 Then, cut the skein into 4 equal sections.

 Next, take one section of floss and one section of skein and try the floss in a double knot around the middle of the skein.


After that, fold the tassel in half and place another piece of floss under the tassel. Then, tie a double or triple knot.
Finally, tie a know at the top of the tassel and Voila! You have a tassel!

This is one of the most time consuming steps. I tied about 224 tassels at the end of it all.. I suggest inviting a willing friend/family member to sit down and help you. I re-watched a few episodes of Gossip Girl with a friend and in no time all of them were done! I also didn't use all the colors of floss that came in my pack, I decided to leave out the tan/white floss to keep my duvet looking really colorful!

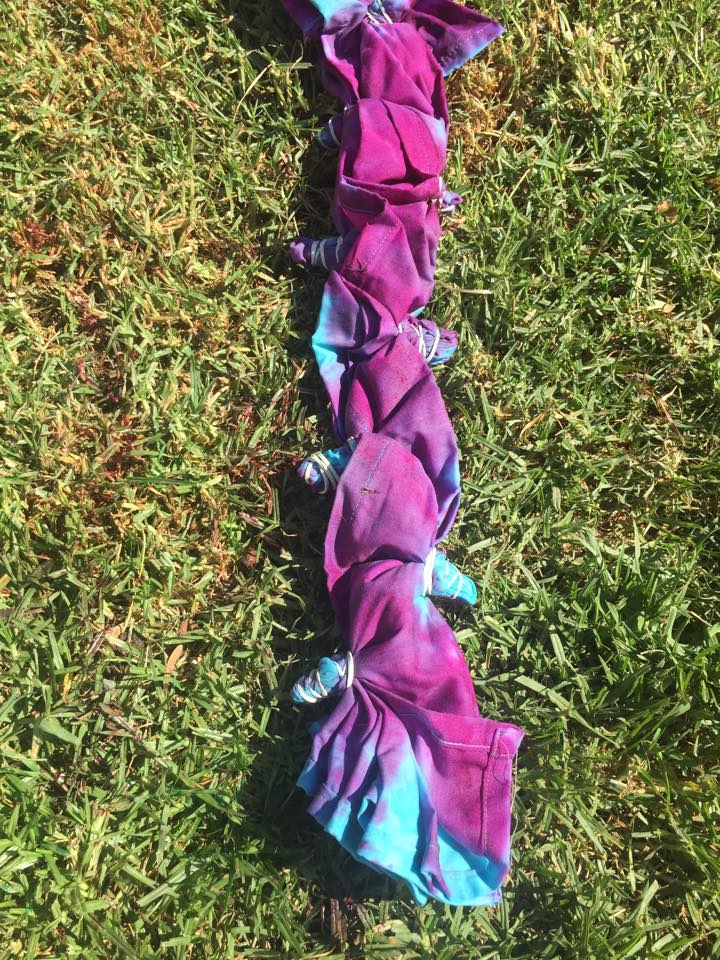
Step Three: Paint your Duvet

So I have in my mind that I want a polka dotted tassel duvet cover. I'm really into big natural messy polka dots, and decided the ones on the collected duvet were a little to small and uniform. I took to the internet to find some inspiration and eventually created this:

Imagining that the entire rectangle is my duvet, this is what I wanted my polka dots to look like. When doing your own research try to find something simple, the less colors the less expensive your materials will be.I only needed to buy one 8 oz. container of screen printing ink. You can really do whatever you want! Use your imagination to create your perfect duvet cover.

I don't have pictures for this step because I originally thought I would be paining both sides, however I only ended up painting the top one, so instead I will give you some tips.
  • Wash/Iron your sheet before you paint it. 
  • Draw your design on with Pencil before you do anything permanent.
  • Use a water color paint brush over a foam pain brush, you get smoother lines.
  • Paint on a flat surface were there will be no wind/ foot traffic for at least 48 hours.
  • Tape the four corners of your sheet down so it is secured while painting. 
  • After 48 hours of drying, iron the places you painted. 
  • Wash the fabric after ironing. 
  • Hang drying produces better results compared to machine drying.
*Letting the screen printing ink is KEY. I washed mine after about 30 hours there was a little bit of black residue left all over my pure white sheet, so I had to wash it again with a small amount of bleach. However bleach weakens your fabric, so getting it right the first time will be helpful.*


Step Four: Sewing

Now I'm no sewing expert. Once I sewed a pillow case in 7th grade for my culinary arts/ home ec class, but that's about the extent of my knowledge. Luckily, I have a seamstress of a mother who knows how to use a sewing machine like its an extension of her hand. Also, Sewing a duvet was almost the same, if not easier than a pillow case, just a lot bigger.

*If you want a better explanation go to The Sewing Rabbit*

The first thing you're going to want to do is arrange your tassels in a pattern that you will use on your duvet and decided how far apart they will be. I settled on sewing each tassel two inches apart.


Next turn your bottom sheet (mine was plain white) right side up and sew the tassels down in a straight line. I did three sides of tassels,(top, left, right) and skipped the bottom because I bought matching bright colorful buttons to go there.

Then take your top sheet and bottom sheet and place the two sides you want to be on the outside, facing towards each other , and sew them together on the right, top, and left.(Kinda like you would sew a pillow case)

Finally make your button holes on the sheet you want to face up on your bed, and sew your buttons on the bottom sheet facing upward. If you need help sewing on the buttons check out this tutorial.

And your done!

Rosie approves!
 Duvet cover sans duvet.
I'm in love with these buttons.


Now you're ready to make the duvet of your dreams! Thanks for reading, if you have any questions feel free to leave a comment. Don't forget to follow our board on Pinterest!

Monday, August 4, 2014

DIY Headboard


Hello everyone! I’m Lauren, and this is my first post on Les Trois Pois! My roommate came to visit before school starts, so while she was down here, we decided to get a head start on stuff for our dorm room. Our big project was making the headboards to spice up our otherwise bland dorm beds. This project was surprisingly easy! Here are the steps for how to make your own DIY headboard (click on the photos to make them bigger!).

Materials:
{  1 piece of ½” plywood (This can be super cheap because it will be covered in fabric later! We got a 39" x 36" piece to match the width of our bed)
{  Fabric (Enough to cover 2-3in on each side)
{  Batting (Enough to cover 2-3in on each side)
{  Thumbtack
{  Ribbon/ string
{  Measuring tape
{  Scissors
{  Pencil
{  Electric jigsaw
{  Electric staple gun
{  5/8” staples


  Assembly: 
         1.  Purchase supplies.     
Fabric: We bought our fabric at Joann's Fabrics, and had them cut the pieces to the size we needed. You can use any type of fabric, however, thicker fabrics are less likely to rip and will provide more cushion. We ended up buying cotton quilted fabric because we liked the thickness and the stitching. Our beds are 39" wide and we wanted the headboard to be 36" high, so we purchased 43" by 40". That way there would be two extra inches on each side. We purchased the same amount of batting.
Wood: We chose the ½” plywood at Home Depot because it was relatively light and inexpensive. They also cut it to scale for us which was super nice!
  
2.   Draw the top shape. For our shape, we chose an elegant curve. In order to create a perfect symmetrical shape, we used a thumbtack and some ribbon (I know it sounds weird, but hang with me because it makes the drawing very simple)


          First, draw a straight line lengthwise down the center of the board.    
                                 

Next, place the thumbtack (with string attached) somewhere on this line. This placement will depend on how long your string is and how steep you want your curve to be. You want the tip of the string long enough to reach the very edge of the board, but short enough to leave room on the sides for the other curves. Just keep adjusting until you find a curve that will work for you. (You are basically just making your own compass, see below).


For the next two curves, you will have to place the thumbtack in the upper corners. Again you will have to adjust the spot you put the tack based your curve preference, but you want these curves to intersect with the big curve you drew in the center. Also make sure that you place the tack in the same position on both sides to guarantee that your board will be symmetrical. An easy way to adjust the string is to tie a knot to secure your place. In the second photo, I colored the main curve blue and the second curve green so you can see the intersection. 
                    

3.   Cut the wood.
For this part, my dad helped us out because he knew how to operate the jigsaw. We put the wood on a trash can to elevate it, and then held down one end as he cut the other. After the cut, he smoothed down the rough edges with a sander. (Pardon the pictures, it was dark outside and they came out a tad blurry)
 
4.   Attach the batting
Lay the batting on a table, center the wood on top, and then cut off the extra fabric on the top corners.
 
Ok! Now staple the batting to the wood with the staple gun. You just need enough staples to secure it because you will be adding a lot more when you attach the fabric.
                                             
 
The curves are a little more difficult, but just cut some 1-2 inch strips into the batting so that it lies flat. You may need some extra hands to help! My mom was sweet enough to help us!
 
5.   Attach the fabric.
Before you start stapling, place a little bit of batting in the corners to provide extra cushion. This will keep the corners from ripping easily. Then it’s the same method as the before, but with more staples! You want to make sure everything is smooth and secure.
 
For the corners, pinch the fabric, smooth down as shown below, and staple away! 
 
And then you’re done! Woo!
                                                                           

Thank you for reading my post! Please leave a comment below with any questions, and let us know how your headboards turn out!

Bisous!

Lauren


**UPDATE!!**


New school year means new headboard design! The color scheme in my room has changed, so I decided to give my headboard a makeover! It is the same headboard, I just added on more fabric!

Hope you all have been well!

Bisous!

Lauren

Wednesday, July 16, 2014

DIY Laptop Sleeve


Hi everyone this is Rachel! With college around the corner, we thought it would be fun to make sleeves for our laptops. They turned out really cute! Natalie is out of town in Oregon for orientation, so Lauren and I made them with our friend who is in town. We bought all of the supplies at our local Jo-Ann Fabric store and it cost around $16 each. The cases I was looking at online were $25-$60. Here's what you will need:

Materials:


  • Half a yard of fabric for the outside
  • Half a yard of fabric for the inside (we used fleece so it would be soft)
  • one zipper at least 6 inches longer than the width of your laptop/ iPad/tablet (if you want it to go all the way around the sides get one that is at least 10 inches longer)
  • one package of batting we got a bag that was 45"by 60" and it easily was enough to make four cases. (we also made one for my brother)
  • charm (for zipper)
  • iron on letters (if you want a monogram)
  • chalk
  • scissors
  • measuring tape
  • sewing machine
If you want a bow like the one I made for my case^, get a fabric solid square.


Directions:

Step One: Measure and use the chalk to outline the area for your fabric pieces. You will need TWO pieces for the outside, TWO pieces for the internal lining, and TWO pieces of batting. Cut the materials so that they are two inches longer than the width (plus the depth)by the length (plus the depth) of your devise. Then cut out all of your pieces.


Step Two: Next, place the zipper face down onto your first external piece and pin the top of the zipper to the top of your fabric. The fabric should be right side up. When attaching the zipper around the edge, cut the zipper a few times so it can bend and be pinned easier.


Step Three: Using your sewing machine, sew your zipper onto your fabric, making sure that you don't sew too close to the zipper itself. Leave around a half inch between your sewing and the stops on the zipper.

Step Four: Then pin the lining and the batting onto the front part of the zipper on the side you just sewed. (Make a fabric sandwich). Then sew both onto the zipper following the seam you just made.


Step Five: Round your edges by cutting off the corners, leaving some fabric behind.

If you would like a pocket, now is the time to make it....

If not skip to step 10.


Step Six: Using a piece of chalk, section out a piece of fabric for your pocket using the leftover pieces from your external fabric. I didn't measure mine exactly, I just compared it to the outside piece and made it the size I wanted.


Step Seven: Fold over the top and pin it and sew the seam shut. 


Step Eight: I made mine with with two pockets by sewing a line through the middle of mine from the bottom to the top.


If you want  a bow add that now.... 

I messed mine up while making it and hd to a bunch of things to fix i, so there won't be pictures or directions on how to make the bow. I looked up how to make it on Pinterest. You can find ideas Here

To put the bow on, Sew along the edges of the bow attaching it to pocket.


Step Nine: Once you attach the bow(if you chose to make one), pin the pocket onto the second outer piece. 


Step Ten:  Turn your fabric right side out and place the second piece of outside fabric facing up on the table. Make sure the backside of the zipper on the pieces you've sewn together is facing you. Pin the external fabric to the clean side of the zipper, cutting the corners of the zipper again to make sewing easier. Sew the fabric onto the zipper. The thickness of the fabric makes this process a little difficult.


Step Eleven: This is the hardest part so just do your best! If you mess up, you can always use a seam ripper. Pin the the second batting on top of the inside lining onto the zipper on the opposite side of where you just sewed. Sew both on.
The pink and blue piece at the bottom of the pile is the piece you just sewed
This is the side opposite of the zipper^

Step Twelve: Move the batting and inside lining out of the way while you work with the outer pieces. Pin the two outer pieces together (so that the outsides of them are facing each other) and then begin sewing the two together. Start at the center of the bottom and sew up until you reach the zipper. Go over the last inch by the zipper to hold it together better. Do the same for the other side.


Cut the edges to round them like we did in the beginning


Step Thirteen: Pin the inside pieces and batting together. Then sew the lining and batting pieces together leaving a gap in-between. The gap will be so you can leaving a gap in-between. The gap will be so you can turn it right side out. 

Step Fourteen: Flip the lining and batting right side out and then do the same with the outer pieces. Sew the gap shut. You may also need to hand sew the edges by the zipper ends shut.

Step Fifteen: If you choose to add charms for your zipper add those and add your monograms after this. I made a case for my brother where I made pocket on his like how they make shirts at Serengetee. 

And Thats It!


The inspiration for our cases came from Here! (:Thanks for reading, please leave your comments below!  I hope your cases turn out well! Enjoy!
 -xoxo Rachel